Archive title

Autem vel eum iriure dolor in hendrerit in vulputate velit esse molestie consequat, vel illum dolore eu feugiat nulla facilisis at vero eros et dolore feugait.

Monthly Archive March 30, 2026

accu chek guide care kit

Accu-Chek Guide Care Kit: A Comprehensive Overview (Updated March 30, 2026)

The Accu-Chek Guide Care Kit provides a complete solution for diabetes management, encompassing a meter, lancing device, and lancets for convenient blood glucose testing.

What is the Accu-Chek Guide Care Kit?

The Accu-Chek Guide Care Kit is a comprehensive system designed to simplify and streamline blood glucose monitoring for individuals managing diabetes. It’s more than just a glucose meter; it’s a complete package intended to provide accurate readings and a comfortable testing experience.

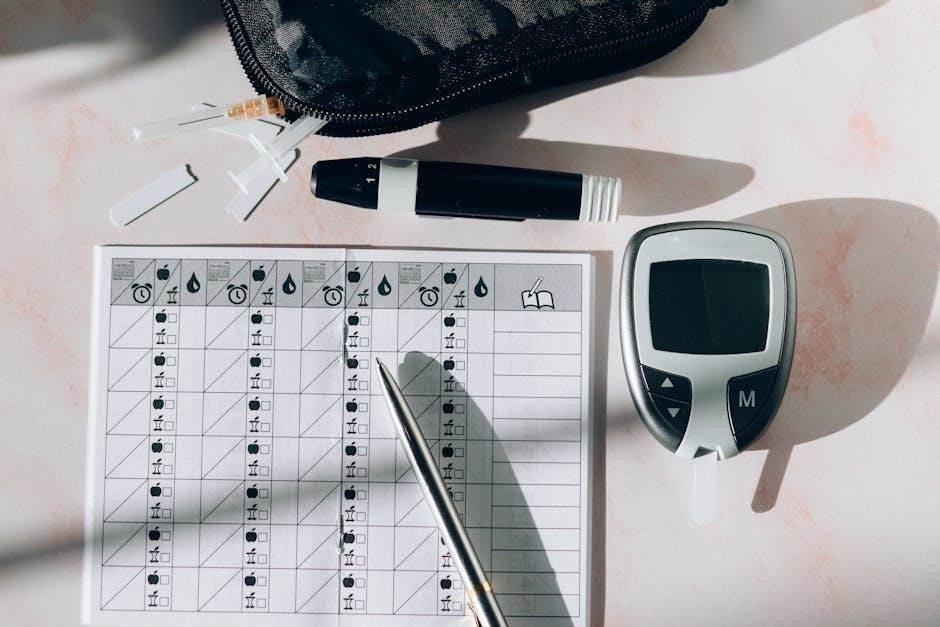
Typically, the kit includes the Accu-Chek Guide meter itself, a Softclix lancing device for obtaining blood samples, and a supply of Softclix lancets. Some variations, like those available on Amazon, may also include test strips. The kit aims to offer everything needed for daily monitoring in one convenient package.

Roche, the manufacturer, positions the Accu-Chek Guide as an easy-to-handle and accurate meter. It’s designed for simplicity, making it suitable for both new and experienced users. Bundles and subscriptions are available directly from the company, offering ongoing supplies and support for long-term diabetes management.

Key Components of the Kit

The Accu-Chek Guide Care Kit centers around several crucial components working in harmony. First, the Accu-Chek Guide meter is the core, displaying blood glucose results and storing data. Paired with it are Accu-Chek Guide test strips, essential for the chemical reaction that measures glucose levels in the blood sample.

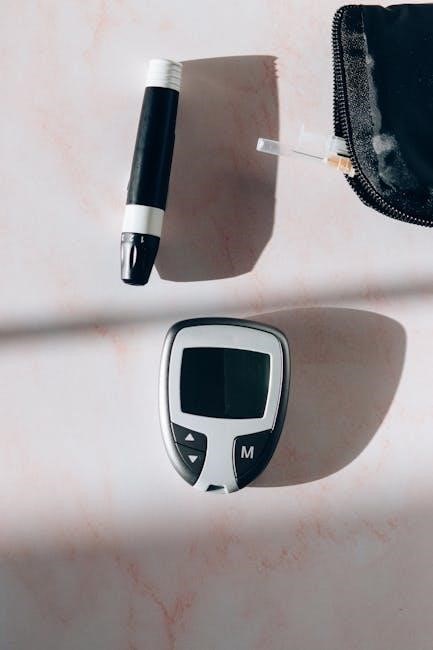
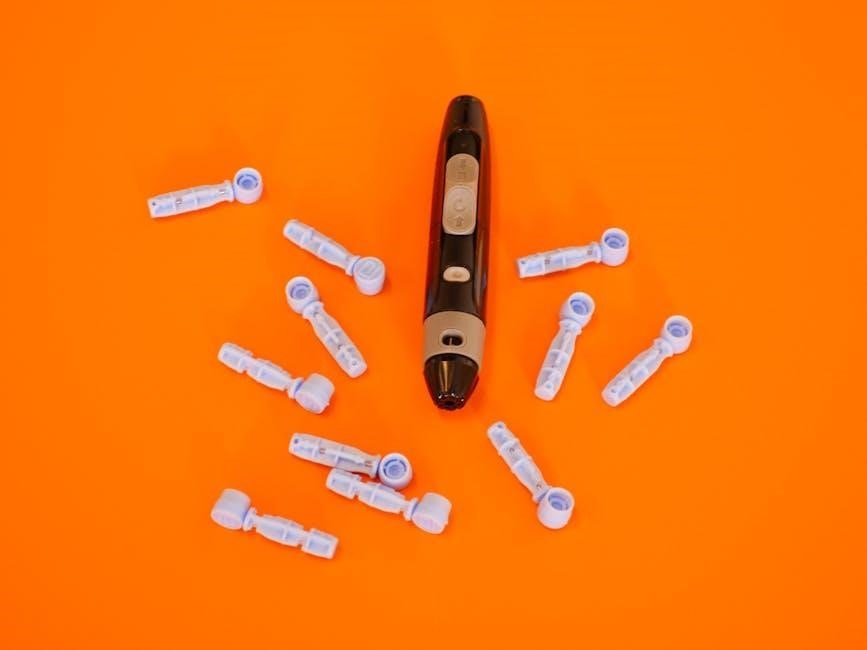
For obtaining the blood sample, the kit includes the Softclix lancing device. This device allows for adjustable penetration depth, aiming to minimize discomfort. Accompanying the lancing device are Softclix lancets – single-use needles designed for a quick and relatively painless prick.

Finally, many kits include a small tool kit, though its contents can vary. Some kits, available through Byram Healthcare, specifically exclude test strips and control solutions, focusing on the device and lancing components. These elements combine to create a self-contained monitoring system.

Accu-Chek Guide Meter: Features and Benefits

The Accu-Chek Guide meter is designed for simplicity and accuracy in blood glucose monitoring. Its key feature is its ease of handling, making it user-friendly for individuals of all ages. The meter boasts a spill-resistant port, protecting it from damage during test strip insertion.

Data management is streamlined with the meter’s ability to store results, allowing users to track their glucose levels over time. It connects wirelessly via Bluetooth to compatible smartphones, enabling data logging and sharing with healthcare professionals.

The Accu-Chek Guide system, including the meter and test strips, is known for its reliable performance. Diabetic Outlet highlights its accuracy, ensuring trustworthy readings for informed diabetes management. Its compact size makes it portable, facilitating testing anywhere, anytime.

Softclix Lancing Device: Pain Management

The Softclix Lancing Device is a crucial component of the Accu-Chek Guide system, specifically engineered to minimize discomfort during blood sampling. Its innovative design incorporates a lancet drum that gently guides the lancet, reducing the impact on the skin. This feature significantly contributes to a less painful testing experience.

The device offers adjustable depth settings, allowing users to customize the penetration level based on their skin type and sensitivity. This personalization ensures optimal sample collection with minimal discomfort.

Furthermore, the Softclix system utilizes pre-filled lancet drums, simplifying lancet changes and promoting hygiene. The device is designed for one-handed operation, enhancing convenience and independence for users. It’s a key element in making blood glucose monitoring more comfortable and manageable.

Softclix Lancets: Ensuring Comfort and Accuracy

Softclix Lancets are specifically designed for use with the Accu-Chek Softclix Lancing Device, playing a vital role in achieving both comfortable and accurate blood glucose readings. These lancets feature a unique triple-bevel tip, which minimizes skin trauma and promotes a smoother, less painful penetration.

The precision engineering of Softclix Lancets ensures a consistent and reliable sample collection, contributing to accurate test results. They are available in various gauges (30G, 33G) to accommodate different skin types and user preferences.

Being pre-sterilized and for single-use only, these lancets prioritize hygiene and minimize the risk of infection. Utilizing genuine Accu-Chek Softclix Lancets guarantees optimal performance and compatibility with the Softclix system, enhancing the overall monitoring experience.

Tool Kit Contents: What’s Included?

The Accu-Chek Guide Care Kit’s tool kit is thoughtfully assembled to support effective diabetes management. While the core components – the Accu-Chek Guide meter, Softclix Lancing Device, and lancets – are central, the kit often includes supplementary items for a comprehensive experience.

Typically, you’ll find a quick reference guide to assist with initial setup and operation of the meter. A carrying case is often included, providing convenient and protective storage for the entire system. Some kits may also contain a logbook for manual recording of blood glucose readings, aiding in trend analysis.

Importantly, it’s crucial to note that test strips and control solution are frequently not included in the base Care Kit and must be purchased separately. This allows users to select the appropriate strip quantity based on their testing frequency.

Understanding Blood Glucose Monitoring

Regular blood glucose monitoring with the Accu-Chek Guide system empowers individuals with diabetes to proactively manage their health and make informed lifestyle decisions.

Why Regular Monitoring is Important

Consistent blood glucose monitoring using the Accu-Chek Guide system is fundamental for effective diabetes management. It allows individuals to understand how food, exercise, and medication impact their blood sugar levels, enabling personalized adjustments to their treatment plan.

Regular testing helps prevent both hyperglycemia (high blood sugar) and hypoglycemia (low blood sugar), minimizing the risk of short-term complications like dizziness or blurred vision, and long-term health issues such as nerve damage, kidney disease, and cardiovascular problems.

The Accu-Chek Guide provides valuable data for informed discussions with healthcare professionals, leading to optimized diabetes control and an improved quality of life. Proactive monitoring empowers individuals to take charge of their health and achieve their target glucose ranges.

Target Blood Glucose Ranges

Establishing personalized target blood glucose ranges is crucial when using the Accu-Chek Guide system. Generally, for individuals with diabetes, a target range of 80-130 mg/dL before meals is recommended. After meals (1-2 hours), the target is typically less than 180 mg/dL.

However, these ranges can vary based on individual factors like age, overall health, diabetes type, and treatment plan. It’s essential to collaborate with a healthcare provider to determine the most appropriate targets.

The Accu-Chek Guide meter assists in tracking results against these goals. Maintaining blood glucose within the target range minimizes the risk of complications and promotes overall well-being. Consistent monitoring and adjustments, guided by professional advice, are key to successful diabetes management.

Factors Affecting Blood Glucose Levels

Numerous factors influence blood glucose readings when utilizing the Accu-Chek Guide. Diet plays a significant role; carbohydrate intake directly impacts glucose levels. Physical activity increases insulin sensitivity, potentially lowering blood sugar. Stress hormones can elevate glucose, while illness often requires adjustments to medication or diet.

Medication, including insulin and oral diabetes drugs, profoundly affects glucose control. Hydration levels and even the time of day can also contribute to fluctuations. Accurate tracking with the Accu-Chek Guide, alongside noting these variables, helps identify patterns.

Understanding these influences empowers individuals to proactively manage their diabetes and optimize their blood glucose control, leading to improved health outcomes.

Using the Accu-Chek Guide System

The Accu-Chek Guide System offers simple, accurate blood glucose monitoring, featuring an intuitive meter and easy-to-use components for effective diabetes management.

Setting Up the Meter

Initial setup of the Accu-Chek Guide meter is straightforward, designed for ease of use even for those new to blood glucose monitoring. First, insert the battery into the designated compartment, ensuring correct polarity. The meter will then power on and prompt you to set the time and date; this is crucial for accurate data logging.

Next, you’ll need to configure the meter with your personal settings. This includes entering your blood glucose target range, as recommended by your healthcare provider. The meter also allows you to select your preferred unit of measurement – mg/dL or mmol/L.

Finally, familiarize yourself with the meter’s buttons and display. Understanding these controls will streamline the testing process. The Accu-Chek Guide meter is designed to be user-friendly, with clear icons and prompts guiding you through each step. Proper setup ensures reliable and personalized monitoring.

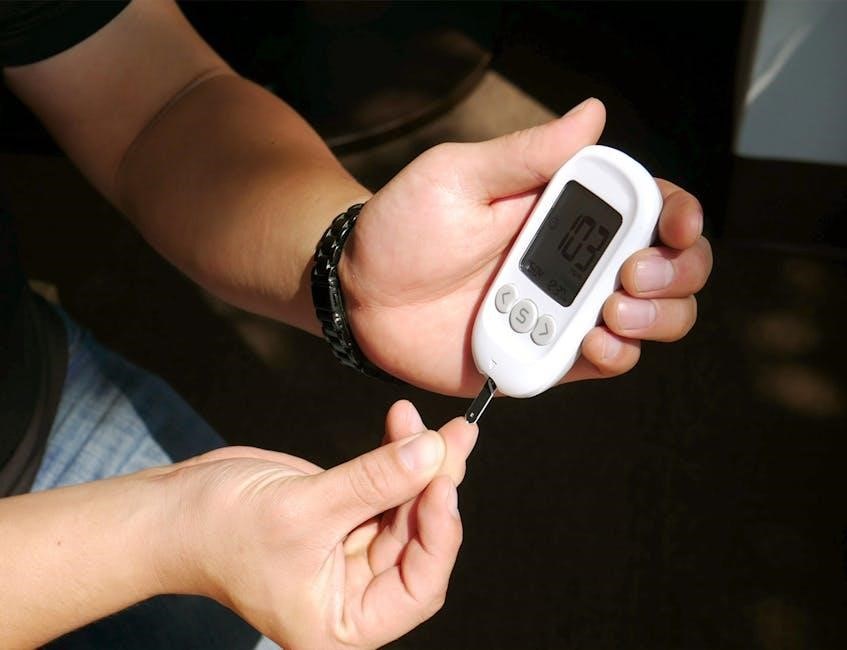
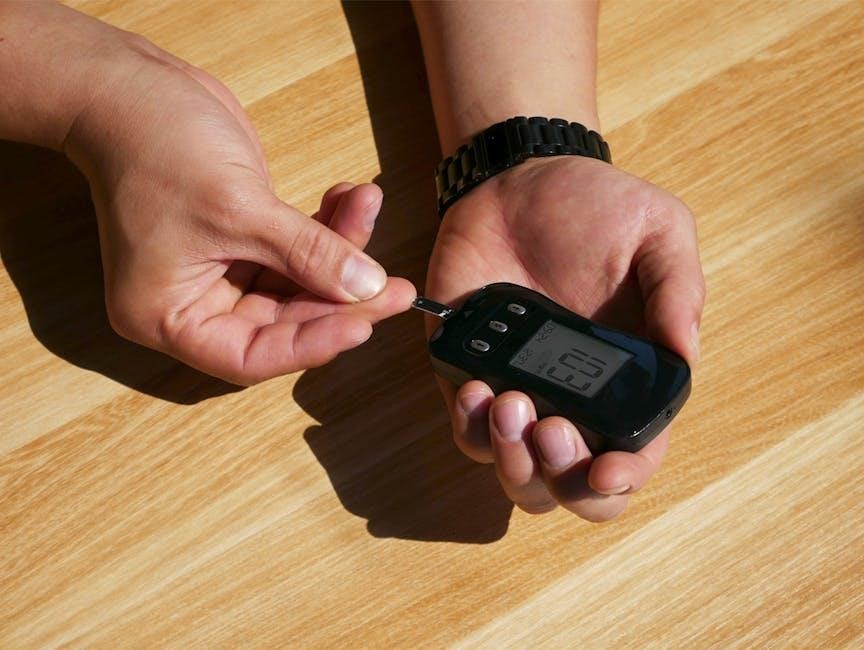
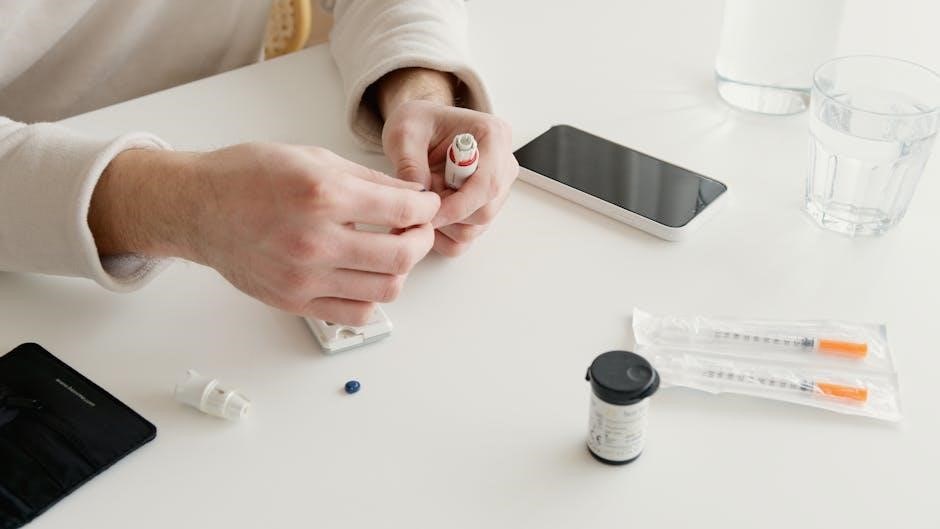
Performing a Blood Glucose Test: Step-by-Step

To perform a test with the Accu-Chek Guide, begin by washing your hands thoroughly with soap and warm water, then drying them completely. Insert a new test strip into the meter; it will automatically power on. Next, use the Softclix lancing device to obtain a small blood sample, typically from a fingertip. Gently press the lancing device against your skin and collect the drop of blood.

Touch the edge of the test strip to the blood drop; the meter will automatically draw in the sample. Avoid smearing the blood. Within seconds, your blood glucose reading will appear on the display. Record the result in your logbook or the meter’s memory for tracking purposes.

Dispose of the used lancet and test strip safely. Repeat the process as needed, following your healthcare provider’s recommendations.

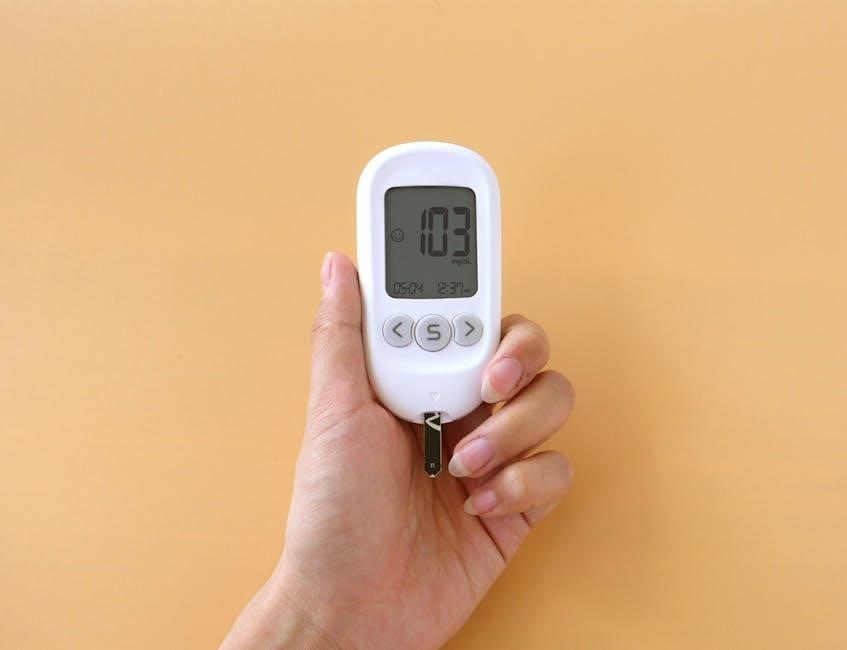
Reading and Interpreting Results

The Accu-Chek Guide meter displays your blood glucose level in milligrams per deciliter (mg/dL). Understanding your results requires knowing your target range, as determined by your healthcare provider. Generally, a reading before meals should be between 80-130 mg/dL, and 1-2 hours after meals, below 180 mg/dL.

However, individual targets vary based on age, health conditions, and treatment plans. High readings may indicate the need for dietary adjustments, increased exercise, or medication adjustments. Low readings could signal hypoglycemia, requiring immediate glucose intake.

Consistent tracking helps identify patterns and trends, aiding in effective diabetes management. Discuss any consistently high or low readings with your doctor for personalized guidance.

Data Logging and Tracking

The Accu-Chek Guide meter stores your blood glucose readings, allowing you to review your history and identify trends. This data is crucial for understanding how diet, exercise, and medication impact your levels. Many users manually log readings in a notebook, but the meter’s memory simplifies this process.

For more comprehensive tracking, consider connecting your meter to the Accu-Chek Connect app via Bluetooth. This app automatically uploads readings, generates reports, and allows you to share data with your healthcare provider.

Consistent data logging empowers you to make informed decisions about your diabetes management, leading to better control and improved health outcomes. Regular review with your doctor is essential.

Accu-Chek Guide Test Strips

Accu-Chek Guide test strips are essential for accurate readings, working seamlessly with the meter; proper storage and usage are vital for reliable results.

Types of Test Strips Available

Accu-Chek Guide primarily utilizes a single type of test strip designed specifically for the Guide meter, ensuring compatibility and accuracy. However, variations exist in packaging and quantity to suit different user needs. You can find these strips sold individually, in bottles of 50, or in larger packs of 100, often bundled with control solution for quality checks.

While the core technology remains consistent, some retailers may offer bundled kits including a higher quantity of strips alongside lancets and the lancing device. It’s important to verify the strip packaging explicitly states compatibility with the Accu-Chek Guide meter to avoid errors.

Currently, there aren’t distinct strip types for different testing scenarios (like ketone monitoring) within the standard Accu-Chek Guide system. Users requiring ketone testing would typically need a separate meter and corresponding ketone test strips. Always consult your healthcare provider for guidance on the appropriate testing regimen.

Proper Storage of Test Strips

Maintaining the integrity of Accu-Chek Guide test strips is crucial for accurate blood glucose readings. Always store the strips in their original vial, tightly closed, in a cool, dry place. Avoid exposing them to direct sunlight, heat, or humidity, as these factors can degrade the chemical reagents and compromise results.

Do not store strips in the bathroom or near sources of water. Ideal storage temperature is between 39°F and 86°F (4°C and 30°C). Never transfer strips to a different container, as this can introduce moisture and affect their performance. Check the expiration date on the vial before each use; expired strips may yield inaccurate readings.

Discard any strips that appear damaged, discolored, or have been exposed to moisture. Proper storage ensures reliable performance and contributes to effective diabetes management.

Ensuring Accurate Test Strip Usage

Accurate blood glucose monitoring with the Accu-Chek Guide system relies heavily on proper test strip usage. Before testing, verify the expiration date and ensure the strip is undamaged. Wash and thoroughly dry your hands before handling the strip to prevent contamination.

Insert the strip correctly into the meter, matching the contact bars. The meter automatically recognizes the strip type, eliminating coding requirements. Apply a sufficient, but not excessive, blood sample to the designated area of the strip – follow the meter’s visual cues. Avoid reapplying blood to the same strip.

Hold the strip steadily until the meter displays a result. Discard the used strip immediately after testing. Following these guidelines minimizes errors and ensures reliable readings for effective diabetes management.

Maintenance and Troubleshooting

Regular cleaning with a damp cloth keeps the meter functioning optimally, while understanding common error codes and battery replacement procedures ensures continued accurate results.

Meter Cleaning and Care

Maintaining the Accu-Chek Guide meter’s cleanliness is crucial for accurate readings and longevity. Regularly wipe the meter’s exterior with a lightly dampened cloth – avoid harsh chemicals or abrasive cleaners, as these can damage the device. Focus on areas that come into contact with skin or blood.

The test strip port should be inspected for debris and gently cleaned if necessary. Ensure the meter is completely dry before inserting new test strips. Avoid immersing the meter in water or any other liquid.

Proper storage also contributes to its care. Keep the meter in a clean, dry place, away from extreme temperatures and direct sunlight. This prevents potential damage to the internal components and ensures reliable performance. Following these simple steps will help maintain the accuracy and functionality of your Accu-Chek Guide meter for years to come.

Common Error Messages and Solutions

The Accu-Chek Guide meter may display error messages indicating potential issues. A frequent message, “Strip Error,” suggests an improperly inserted or damaged test strip – ensure correct insertion and use a fresh strip. “System Error” often requires turning the meter off and on; if persistent, contact customer support.

If you encounter a “Low Battery” warning, replace the batteries immediately to avoid inaccurate readings. “Data Error” may occur during data transfer; verify the connection and try again.

For unresolved errors, consult the user manual or the Accu-Chek website for detailed troubleshooting steps. Remember to record the specific error message for accurate assistance when contacting customer support. Addressing these errors promptly ensures continued reliable blood glucose monitoring.

Battery Life and Replacement

The Accu-Chek Guide meter operates on standard batteries, typically two AAA batteries. Battery life varies depending on usage frequency and environmental factors, but generally provides readings for approximately 1000 tests. The meter displays a low battery indicator when replacement is needed, preventing unexpected interruptions during testing.

To replace the batteries, locate the battery compartment (refer to the user manual for specific location). Ensure correct polarity when inserting new batteries. Using high-quality alkaline batteries is recommended for optimal performance and longevity.

Avoid mixing old and new batteries, or different battery types. Prompt battery replacement guarantees accurate and consistent blood glucose measurements, crucial for effective diabetes management.

Where to Purchase the Accu-Chek Guide Care Kit

The Accu-Chek Guide Care Kit is readily available through online retailers like Amazon, pharmacies, medical supply stores, and directly from Roche/Accu-Chek’s website.

Online Retailers (Amazon, etc.)

Amazon.com stands as a prominent online destination for acquiring the Accu-Chek Guide Care Kit, offering various configurations to suit individual needs. Customers can find options ranging from the basic kit including the meter, lancing device, and lancets, to more comprehensive bundles featuring test strips and control solutions.

Notably, Amazon frequently lists the Accu-Chek Guide Me Glucose Monitor Kit alongside the standard Accu-Chek Guide Glucose Monitor Kit. Competitor kits, such as the AUVON Blood Glucose Monitor Kit, are also often displayed alongside, allowing for convenient comparison shopping.

Purchasing through Amazon often provides benefits like competitive pricing, fast shipping options (including Prime delivery), and customer reviews to aid in decision-making. It’s advisable to check for current promotions and subscription options for potential cost savings on ongoing test strip needs. Always verify the seller’s reputation and product authenticity before completing a purchase.

Pharmacies and Medical Supply Stores

Pharmacies like CVS, Walgreens, and Rite Aid commonly stock the Accu-Chek Guide Care Kit, providing a convenient option for those preferring in-person purchases. Availability may vary by location, so checking store inventories online or calling ahead is recommended. These stores often accept prescription benefits cards for diabetes supplies, potentially lowering out-of-pocket costs.

Medical supply stores, both national chains and local providers, represent another reliable source. These specialized retailers typically offer a wider selection of diabetes-related products, including various Accu-Chek accessories and support items.

Purchasing from these locations allows for direct consultation with pharmacists or trained staff regarding product selection and usage. Additionally, some stores offer services like meter training and disposal programs for used lancets and test strips, ensuring responsible handling of medical waste. Cub pharmacies also offer same-day delivery options.

Directly from Roche/Accu-Chek

Purchasing directly from Roche/Accu-Chek, the manufacturer, offers several benefits, including access to the most up-to-date product information and potential enrollment in subscription services. The official Accu-Chek website allows customers to buy the Guide Care Kit and related supplies, often with options for automated refills to ensure uninterrupted monitoring.

Roche frequently provides exclusive promotions and discounts for direct purchases, alongside access to comprehensive customer support and educational resources. This can be particularly valuable for new users seeking detailed guidance on utilizing the system effectively.

Furthermore, buying directly ensures product authenticity and allows participation in loyalty programs. Roche also shares real-world evidence and updates regarding their products, keeping customers informed about advancements in diabetes management. Subscriptions can streamline supply replenishment, simplifying the process of maintaining consistent blood glucose monitoring.

cessna 172 service manual

Cessna 172 Service Manual: A Comprehensive Overview

Essential for safe operation, the Cessna 172 service manual details maintenance, inspections, and repairs – a vital document carried within the aircraft always․

The Cessna 172 Service Manual is the definitive guide for maintaining this iconic aircraft, encompassing detailed procedures for all levels of technicians and owners․ This manual isn’t merely a collection of instructions; it’s a cornerstone of airworthiness, ensuring continued safe operation․ It meticulously outlines every aspect of the aircraft’s upkeep, from routine inspections to complex repairs, covering models Cessna 170, 170A, 170B, and the widely flown Cessna 172 series․

Crucially, this document must be readily available within the aircraft’s maintenance records; It serves as a reference point for adherence to regulatory standards and best practices․ Understanding its contents is paramount for anyone involved in the aircraft’s maintenance, guaranteeing compliance and promoting longevity․ The manual’s scope extends to engine specifics, airframe integrity, and system functionality․

Importance of the Aircraft Maintenance Manual (AMM)

The Aircraft Maintenance Manual (AMM) is fundamentally critical for the safe and continued airworthiness of any aircraft, especially the Cessna 172․ It’s not simply a helpful guide, but a legally mandated document ensuring all maintenance actions are performed to approved standards․ Proper adherence minimizes risks, extends the aircraft’s lifespan, and maintains its resale value․

Furthermore, the AMM provides a standardized approach to maintenance, reducing errors and promoting consistency across different maintenance facilities․ It details authorized modifications – known as minor change designs – and ensures proper documentation of all work performed in the aircraft’s logbooks․ Without a current and correctly utilized AMM, regulatory compliance becomes impossible, potentially grounding the aircraft and incurring significant penalties․

Document Control and Revision History

Maintaining strict document control is paramount with the Cessna 172 service manual․ The manual itself must be kept current, reflecting all applicable revisions and updates issued by Cessna or authorized aviation authorities․ A detailed revision history, typically found within the manual, tracks each change, including the date, reason, and specific pages affected․

This history is crucial for ensuring technicians are working with the most accurate information․ Outdated manuals can lead to incorrect maintenance procedures, potentially compromising safety․ Regular checks against official sources, like Cessna’s documentation, are essential․ Proper control also includes managing distribution – ensuring only authorized personnel have access to the current version, and that superseded copies are clearly marked and removed from service․

Aircraft Systems & Maintenance

Detailed procedures cover engine, airframe, landing gear, fuel, and electrical systems, ensuring proper Cessna 172 upkeep and operational reliability․

Engine Maintenance – Specific to Cessna 172 Models

Cessna 172 engine maintenance demands meticulous adherence to the service manual’s guidelines, varying slightly across models (F, G, H, I, K, L, M, N)․ Regular oil analysis is crucial, interpreting results to identify potential internal issues before they escalate․

Maintenance includes inspecting and replacing filters, checking magneto functionality, and ensuring proper carburetor operation․ Specific attention must be paid to TAE 125-02-114 engines, as outlined in IM-20-02S․

Motor oil changes should follow recommended schedules, utilizing appropriate grades․ Thorough inspection of cylinders, valves, and spark plugs is paramount․ Any discrepancies discovered during inspection require immediate attention and documentation within the aircraft’s logbook, adhering to approved maintenance releases․

Airframe Maintenance – Inspection and Repair

Comprehensive airframe maintenance, guided by the Cessna 172 service manual, is vital for structural integrity․ Inspections encompass the fuselage, wings, and tail surfaces, searching for corrosion, cracks, or damage․ Repair procedures must strictly adhere to approved data and minor change designs․

Regularly check control surfaces for freedom of movement and proper alignment․ Skin inspections are crucial, particularly around rivets and areas prone to stress․ Documentation of all inspections and repairs is mandatory in the aircraft’s maintenance logbook․

Any structural repairs require qualified personnel and approved materials․ Maintaining up-to-date flight and maintenance manuals ensures compliance with regulatory standards and safe operation․

Landing Gear Maintenance & Overhaul

Proper landing gear maintenance, as detailed in the Cessna 172 service manual, is paramount for safe landings and ground operations․ Inspections focus on shock struts, tires, brakes, and wheel assemblies, checking for wear, damage, and proper lubrication․

Overhaul schedules are dictated by time or cycles, requiring disassembly, inspection, and replacement of worn components․ Brake systems demand meticulous attention, ensuring effective stopping power․ Tire pressure and tread depth must be consistently monitored․

Detailed documentation of all landing gear work is essential for maintaining accurate maintenance records․ Adherence to the manual’s guidelines guarantees continued airworthiness and operational safety․

Fuel System Maintenance – Inspection and Cleaning

Maintaining a pristine fuel system, as outlined in the Cessna 172 service manual, is critical for engine performance and safety․ Regular inspections encompass fuel tanks, lines, filters, and the carburetor or fuel injection system, searching for leaks, corrosion, or obstructions․

Cleaning procedures involve draining fuel tanks to remove sediment and water, flushing fuel lines, and meticulously cleaning fuel filters․ Proper fuel grade and additive usage are also addressed․

Detailed logbook entries documenting all fuel system maintenance are crucial․ Strict adherence to the manual’s recommendations ensures reliable engine operation and prevents potential hazards․

Electrical System Maintenance – Troubleshooting and Repair

The Cessna 172’s electrical system demands diligent maintenance, as detailed within the service manual․ Troubleshooting procedures cover common issues like battery failures, faulty alternators, and wiring malfunctions․ The manual provides schematics for efficient fault isolation․

Repair procedures emphasize safe disconnection of power sources before working on any electrical component․ Replacement of damaged wiring, connectors, and circuit breakers is thoroughly explained․ Proper use of testing equipment, like multimeters, is essential․

Logbook documentation of all electrical repairs and inspections is paramount for maintaining airworthiness and ensuring continued safe operation of the aircraft’s systems․

Inspection Procedures

Detailed checklists within the Cessna 172 service manual guide annual, 100-hour, and pre-flight inspections, ensuring thorough examination of all aircraft components․

Annual Inspection Checklist

The annual inspection, a cornerstone of Cessna 172 maintenance, demands meticulous adherence to a comprehensive checklist detailed within the service manual․ This rigorous process, typically performed by a certified A&P mechanic, ensures continued airworthiness․ Key areas include a thorough examination of the engine – checking for wear, leaks, and proper operation – alongside a detailed inspection of the airframe for corrosion, cracks, and structural integrity․

Furthermore, the landing gear receives focused attention, encompassing inspection of tires, brakes, and the overall structural condition․ The fuel system is scrutinized for leaks and contamination, while the electrical system undergoes testing to verify proper functionality․ Control surfaces, cables, and the trim system are also carefully assessed․ Logbook documentation of all findings and corrective actions is paramount, ensuring a traceable maintenance history and compliance with regulatory requirements․

100-Hour Inspection Requirements

The 100-hour inspection, mandated for Cessna 172s operated for hire, represents a less extensive, yet crucial, maintenance check․ The service manual outlines specific requirements, focusing on items prone to wear or failure within this timeframe․ This includes a detailed inspection of the engine oil and filters, along with a check of propeller condition and security․

Additionally, the inspection covers flight controls, ensuring free and correct movement, and a review of the fuel system for leaks․ Landing gear tires and brakes receive attention, alongside a verification of the proper operation of all lights․ While not as exhaustive as the annual inspection, diligent completion and thorough documentation in the aircraft logbooks are essential for continued legal operation and maintaining airworthiness standards․

Pre-Flight Inspection Detailed Guide

The Cessna 172 service manual emphasizes a meticulous pre-flight inspection as paramount for safety․ This detailed guide begins with a walk-around, checking for structural damage, fuel leaks, and proper control surface movement; Tire pressure, brake functionality, and landing gear strut extension are critical components․

Next, the inspection moves to the engine compartment, verifying oil levels, coolant, and the security of engine accessories․ Inside the cockpit, instruments, flight controls, and avionics are thoroughly tested․ The pilot’s operating handbook (POH) supplements the service manual, providing specific checklists․ A comprehensive pre-flight, documented appropriately, mitigates risks and ensures a safe and enjoyable flight experience for all occupants․

Transponder and ELT Inspection Procedures

The Cessna 172 service manual details rigorous inspection procedures for the transponder and Emergency Locator Transmitter (ELT)․ Transponder functionality requires verifying proper code setting, altitude reporting, and response to interrogation from Air Traffic Control․ Regular testing, as mandated by regulations, confirms operational status․

ELT inspections involve checking battery expiration dates, antenna connection security, and performing self-tests to ensure signal transmission capability․ The manual stresses the importance of documenting these tests in the aircraft’s logbook․ Proper functioning of both systems is crucial for air traffic surveillance and search-and-rescue operations in emergency situations, contributing significantly to flight safety․

Component Maintenance

The Cessna 172 service manual guides detailed maintenance of avionics, trim, control cables, and flaps, ensuring optimal performance and airworthiness․

Avionics Maintenance – Troubleshooting Common Issues

Addressing avionics challenges within the Cessna 172 demands a systematic approach, detailed within the service manual․ Common issues include communication radio failures, navigation system inaccuracies, and transponder malfunctions․ The manual provides step-by-step troubleshooting guides, focusing on verifying power supply, antenna connections, and software integrity․

Proper diagnostics involve utilizing test equipment to isolate faults, referencing wiring diagrams, and consulting component maintenance manuals․ Regular inspections, as outlined, help prevent failures․ The manual emphasizes the importance of qualified technicians for complex repairs, ensuring adherence to FAA regulations and maintaining the aircraft’s safety and operational reliability․ Thorough logbook entries are crucial for tracking all avionics maintenance performed․

Trim System Maintenance – Rudder and Elevator

Maintaining the Cessna 172’s manually operated rudder and elevator trim is crucial for flight control․ The service manual details inspection procedures for proper operation, focusing on smooth movement and secure locking mechanisms․ Regular checks involve verifying cable tension, control surface travel, and the absence of binding or excessive play․

Lubrication of pivot points, as specified, prevents corrosion and ensures responsiveness․ The manual outlines adjustment procedures to correct imbalances or sluggish control feel․ Any worn or damaged components, including cables and linkages, must be replaced by qualified personnel․ Accurate logbook documentation of all maintenance is essential, guaranteeing continued airworthiness and pilot confidence during operation․

Control Cable Inspection and Replacement

The Cessna 172 service manual emphasizes rigorous control cable inspection as a cornerstone of airworthiness․ Inspections must cover the entire cable run – from cockpit controls to control surfaces – checking for fraying, kinking, corrosion, and proper tension․ Look closely at termination points for secure attachment and wear․

Replacement is mandatory if any defects are found, utilizing only Cessna-approved cables and hardware․ Proper routing is critical, adhering strictly to the manual’s diagrams to prevent interference or binding․ After replacement, a full range of motion test and control surface balance check are required․ Detailed logbook entries documenting cable serial numbers, dates, and personnel involved are essential for regulatory compliance and safety․

Flap System Maintenance – Actuation and Adjustment

The Cessna 172 service manual details meticulous flap system maintenance, focusing on smooth and precise actuation․ Inspections involve checking flap hinges for wear, proper movement throughout the range, and secure attachment of control linkages․ Examine the flap motor (if equipped) for proper operation and lubrication․

Adjustment is crucial for symmetrical flap deployment, verified using a flap position indicator or visual inspection․ Any binding or uneven movement requires immediate attention․ Replacement of worn components, like hinges or cables, must follow Cessna’s guidelines․ Thorough logbook documentation of all maintenance, adjustments, and component replacements is vital for continued airworthiness and regulatory adherence․

Troubleshooting & Repair

The Cessna 172 service manual guides technicians through diagnosing common issues, offering repair procedures, and interpreting oil analysis results for optimal performance․

Common Cessna 172 Maintenance Issues

Addressing typical Cessna 172 concerns requires diligent adherence to the service manual’s guidelines․ Frequent issues include carburetor icing, particularly during colder months, necessitating regular inspections and potential overhaul․ Oil leaks, often stemming from seals or gaskets, demand prompt attention to prevent engine damage․ Electrical system malfunctions, such as faulty wiring or failing components, are also common, requiring careful troubleshooting․

Furthermore, control cable wear and tear, alongside trim system inconsistencies, impact flight control and necessitate thorough inspection and potential replacement․ Landing gear maintenance, focusing on brake systems and tire condition, is crucial for safe landings․ The service manual provides detailed procedures for diagnosing and rectifying these issues, ensuring continued airworthiness and operational safety․ Proper logbook entries are vital for tracking all maintenance performed․

Oil Analysis Program & Interpretation

Implementing an oil analysis program is a proactive maintenance strategy detailed within the Cessna 172 service manual․ Regular oil samples reveal crucial insights into engine health, detecting wear metals like iron, aluminum, and copper․ Elevated levels indicate potential component degradation – piston rings, bearings, or cylinder walls․

Analyzing viscosity changes identifies fuel dilution or oil breakdown․ Spectrometric analysis pinpoints specific contaminants, such as coolant leaks or salt water intrusion․ The service manual provides acceptable limits for each parameter, aiding interpretation․ Trending data over time reveals wear patterns, allowing for preventative maintenance before catastrophic failure․ Accurate logbook documentation of oil analysis results is essential for tracking engine condition and maintaining airworthiness․

Minor Change Designs for Cessna 170/172 Series

The Cessna 172 service manual references numerous minor change designs applicable to the 170/172 series aircraft․ These designs, often documented as Maintenance Releases, authorize modifications enhancing safety or operational efficiency․ Examples include alterations to control systems, electrical components, or structural reinforcements․

Proper implementation requires strict adherence to the approved design documentation․ Mechanics must verify applicability to the specific aircraft serial number and ensure all associated inspections are completed․ Logbook entries must clearly detail the modification, including the design approval number and mechanic’s certification․ These changes are crucial for maintaining compliance with airworthiness directives and ensuring continued safe operation of the aircraft, as outlined within the manual․

Maintenance Release and Logbook Entries

The Cessna 172 service manual emphasizes meticulous record-keeping․ A Maintenance Release signifies completion of approved maintenance, authorizing the aircraft’s return to service․ This document details work performed, parts used (with serial numbers where applicable), and mechanic certification․

Corresponding Logbook Entries are paramount, mirroring the Maintenance Release details․ They provide a continuous history of the aircraft’s maintenance․ Mechanics must sign and date each entry, including their certificate number․ Proper logbook entries are vital for tracking compliance with inspection schedules, Airworthiness Directives, and minor change designs․ Accurate records are essential during audits and contribute to maintaining the aircraft’s airworthiness, as dictated by the manual’s procedures․

Regulatory Compliance & Programs

Adherence to regulations is key; the Cessna 172 manual supports Aircraft Maintenance Programs (AMPs), though LBA approval for ELA1 aircraft is evolving․

Aircraft Maintenance Program (AMP) Considerations

Developing a robust Aircraft Maintenance Program (AMP) for a Cessna 172 requires careful attention to regulatory guidelines and operational needs․ While the German LBA (Luftfahrt-Bundesamt) currently doesn’t approve AMPs for ELA1 aircraft – encompassing many Cessna 172s – operators must still maintain meticulous records and adhere to established inspection schedules․

Instead of a formal AMP, compliance relies on consistently updated flight and maintenance manuals․ This includes diligent tracking of all maintenance performed, utilizing the Cessna 172 service manual as the primary reference․ Operators should prioritize safety and airworthiness, ensuring all inspections and repairs are documented thoroughly in the aircraft’s logbooks․

Understanding the evolving regulatory landscape is crucial, as policies regarding AMPs for ELA1 aircraft may change․ Staying informed through official aviation authorities and industry resources is paramount for continued safe and compliant operation of the Cessna 172․

vokera easi heat plus manual

Vokera Easi Heat Plus Manual: A Comprehensive Guide

Recent concerns highlight potential political interference impacting scientific resources for legal professionals, mirroring debates about accurate information access and independent expertise.

The Vokera Easi Heat Plus is a highly efficient and reliable condensing combination boiler, designed to provide both central heating and domestic hot water for your home. This manual serves as a comprehensive guide to understanding, installing, operating, and maintaining this sophisticated heating system. It’s crucial to familiarize yourself with its features and safety precautions before undertaking any work.

Recent discussions surrounding the integrity of reference materials, like those used by legal professionals, underscore the importance of accurate and unbiased documentation. Similarly, this manual aims to provide clear, concise, and dependable information regarding your Vokera boiler. Proper understanding ensures optimal performance, longevity, and, most importantly, safe operation.

This guide will cover everything from initial setup and commissioning to troubleshooting common issues and performing essential maintenance. It’s designed for both qualified heating engineers and homeowners seeking a deeper understanding of their heating system. Remember, safety is paramount, and any work involving gas or electrical components should be carried out by a competent professional.

Understanding the System Components

The Vokera Easi Heat Plus comprises several key components working in harmony to deliver efficient heating and hot water. These include the heat exchanger, responsible for transferring heat from combustion gases to the water; the control unit, acting as the ‘brain’ of the system, managing temperature and operation; and the circulating pump, ensuring water flow throughout the heating circuit.

Further essential parts are the fan, facilitating efficient combustion and flue gas expulsion, and the gas valve, regulating gas supply. The system also features safety devices like pressure relief valves and sensors. Much like the detailed scientific references vital for informed decisions, each component plays a critical role.

Understanding the function of each part is crucial for effective troubleshooting and maintenance. Regular inspection of these components, performed by a qualified engineer, will help identify potential issues before they escalate, ensuring continued reliable performance and extending the boiler’s lifespan. Familiarity breeds confidence and safety.

The Heat Exchanger: Function and Maintenance

The heat exchanger is the core of the Vokera Easi Heat Plus, facilitating heat transfer from combustion gases to the heating system’s water. Its efficiency directly impacts overall boiler performance. Over time, scale buildup from hard water can reduce this efficiency, acting like an impediment to clear information, much like contested scientific data.

Regular maintenance, specifically descaling, is vital to prevent damage and maintain optimal heat transfer. This process removes mineral deposits, ensuring efficient operation. Signs of a failing heat exchanger include reduced heating output and increased energy consumption.

Annual servicing by a qualified engineer should include a thorough inspection for corrosion or leaks. Addressing these issues promptly prevents costly repairs or replacement. Ignoring maintenance can lead to system failure, mirroring the consequences of disregarding crucial evidence. Proper care extends the heat exchanger’s lifespan and ensures reliable heating.

The Control Unit: Key Features and Settings

The Vokera Easi Heat Plus control unit serves as the central hub for system operation, offering a range of features for customized heating and hot water control. Similar to a judge relying on a reference manual, users depend on this unit for accurate system management.

Key settings include temperature adjustment for both heating and domestic hot water, timer functions for programmable operation, and various operating modes like ‘comfort’ and ‘eco’. The display panel provides crucial system information, including current temperature, error codes, and operating status.

Understanding these settings allows for optimized energy efficiency and personalized comfort. The unit’s interface is designed for intuitive navigation, though consulting the manual is recommended for advanced features. Like ensuring unbiased scientific evidence, proper control unit configuration is essential for reliable performance and avoiding unexpected issues.

The Pump: Operation and Troubleshooting

The Vokera Easi Heat Plus’s pump is vital for circulating hot water throughout the heating system. Its operation relies on consistent power and proper priming. Similar to a legal reference manual ensuring consistent application of rules, the pump needs reliable function for system integrity.

Common issues include pump failure, airlocks, and reduced flow rate. A failing pump often presents with cold radiators or inconsistent heating. Airlocks can cause noisy operation and reduced efficiency, requiring bleeding of the system. Reduced flow may indicate a blockage or pump speed issue.

Troubleshooting involves checking power supply, verifying pump operation, and inspecting for blockages. If issues persist, professional assistance is recommended. Ignoring pump problems can lead to system overheating or damage, mirroring the consequences of ignoring critical evidence in a legal case.

The Fan: Ensuring Efficient Ventilation

The Vokera Easi Heat Plus utilizes a fan to effectively vent combustion gases safely to the outside, crucial for efficient and safe operation. Much like a judge relying on a comprehensive reference manual, the boiler relies on the fan for proper function.

A malfunctioning fan can lead to incomplete combustion, carbon monoxide buildup, and system shutdown. Signs of a problem include unusual noises, reduced airflow, or the boiler entering an error state. Proper ventilation is paramount for preventing dangerous gas accumulation.

Troubleshooting involves visually inspecting the fan blades for obstructions, checking for electrical connectivity, and ensuring the flue is clear. If the fan fails to operate correctly, immediate professional attention is required. Ignoring fan issues poses a significant safety risk, similar to disregarding crucial scientific evidence.

Installation and Setup

Proper installation of the Vokera Easi Heat Plus is critical for optimal performance and longevity, akin to a judge meticulously referencing a manual for accurate rulings. This process must be carried out by a qualified and certified heating engineer, adhering strictly to local regulations and the manufacturer’s guidelines.

Key considerations include adequate space for ventilation, correct flue sizing and installation, and secure gas connection compliance. Incorrect installation can lead to inefficient operation, safety hazards, and voided warranties. The engineer will verify gas pressure, system water pressure, and electrical connections.

Post-installation, a thorough system check and commissioning process are essential. This includes testing all safety devices, verifying correct operation of the control unit, and ensuring proper combustion. Like ensuring the integrity of scientific evidence, a careful setup is vital.

Initial System Setup and Commissioning

Commissioning the Vokera Easi Heat Plus involves a series of crucial steps to ensure safe and efficient operation, mirroring the careful validation of evidence presented in court. Following installation, the heating engineer will perform a comprehensive system check, verifying all components function correctly.

This includes purging air from the system, setting the correct heating and hot water parameters, and testing the safety devices – crucial for preventing hazards. The engineer will also check the flue for proper draft and ensure correct combustion efficiency. Like a judge reviewing a reference manual, precision is key.

Detailed records of the commissioning process, including gas pressure readings and system settings, should be retained for future reference and servicing. Proper commissioning guarantees optimal performance and minimizes potential issues.

Flue Installation: Safety and Regulations

Correct flue installation is paramount for the safe operation of the Vokera Easi Heat Plus, akin to the rigorous standards applied to scientific evidence in legal proceedings. All installations must adhere to current gas safety regulations and building codes, ensuring proper ventilation and preventing carbon monoxide buildup – a potentially fatal hazard.

The flue must be of the correct type and diameter, compatible with the boiler model, and installed with the correct slope to facilitate condensate drainage. Careful consideration must be given to the flue’s termination point, avoiding obstructions and ensuring adequate clearance from combustible materials.

Regular inspection of the flue for corrosion, damage, or blockages is vital. Like maintaining the integrity of a reference manual, consistent checks are essential for long-term safety and performance. Non-compliance can invalidate warranties and pose serious risks.

Gas Connection: Requirements and Best Practices

Establishing a secure gas connection for the Vokera Easi Heat Plus demands strict adherence to national and local gas safety regulations, mirroring the precision required when presenting scientific evidence in court. Only a Gas Safe registered engineer should undertake this critical task. The gas supply must meet the boiler’s specified inlet pressure and flow rate, verified with appropriate testing equipment.

Before connection, the gas supply pipework must be thoroughly purged to remove any air, and a gas tightness test performed to detect leaks. The connection point should be easily accessible for future maintenance and inspection.

Employing best practices, such as using approved gas connectors and ensuring adequate ventilation around the meter, is crucial. Like ensuring the independence of a reference manual, maintaining gas safety is paramount.

Operating the Vokera Easi Heat Plus

Successfully operating your Vokera Easi Heat Plus begins with familiarizing yourself with the control unit and display panel. Like judges relying on a clear reference manual, users need accessible information. Initial operation involves powering on the boiler and allowing the system to conduct its self-diagnostic checks – a process akin to verifying evidence integrity.

Adjusting the room temperature is straightforward using the dedicated controls. For hot water, ensure the diverter valve is correctly positioned. Utilizing the timer functions allows for pre-programmed heating schedules, optimizing comfort and energy efficiency.

Pay close attention to the display panel indicators, as these provide valuable insights into the boiler’s operational status. Understanding these signals is vital for proactive maintenance, much like recognizing potential biases in presented data.

Setting the Temperature and Hot Water

Precisely controlling temperature and hot water output on your Vokera Easi Heat Plus is crucial for comfort and efficiency. The boiler’s control unit features intuitive dials or digital interfaces for adjusting both parameters. Room temperature is typically set via a thermostat control, allowing for desired heating levels. Remember, accurate settings are as important as unbiased evidence in a legal setting.

For hot water, adjustments control the water temperature delivered to taps and showers. Some models offer pre-set temperature options, while others allow for precise degree-by-degree control. Understanding the system’s response time is key – it may take a few minutes for changes to take effect.

Regularly review and adjust settings based on seasonal changes and personal preferences, ensuring optimal performance and energy conservation.

Using the Timer and Programmable Functions

The Vokera Easi Heat Plus boasts sophisticated timer and programmable functions, enabling customized heating schedules for optimal comfort and energy savings. These features allow you to pre-set heating periods, aligning with your daily routine – similar to ensuring reliable scientific references for consistent legal judgements.

Access the programming mode through the control unit’s interface. You can typically define multiple heating periods per day, specifying start and end times, and desired temperatures for each. Advanced models may offer different programs for weekdays and weekends.

Utilizing these functions minimizes energy waste by ensuring the boiler only operates when needed. Explore the manual for detailed instructions on setting up and modifying programs, maximizing the boiler’s efficiency and reducing your carbon footprint.

Understanding the Display Panel Indicators

The Vokera Easi Heat Plus display panel provides crucial system status information, akin to a judge relying on clear evidence. Familiarizing yourself with these indicators is vital for efficient operation and swift troubleshooting. Common icons include a flame symbol indicating active heating, a water tap for hot water availability, and temperature readouts for both central heating and domestic hot water.

Error codes, displayed as alphanumeric sequences, signal potential faults. Refer to the troubleshooting section of this manual to decode these messages and implement appropriate solutions. A flashing indicator often signifies a temporary issue or a request for user input.

Pay close attention to warnings related to low water pressure or gas supply. Regularly checking the display panel ensures proactive maintenance and prevents unexpected system failures, mirroring the need for reliable scientific data.

Troubleshooting Common Issues

Addressing problems promptly with your Vokera Easi Heat Plus is crucial, much like swiftly addressing challenges to scientific integrity. Common issues include a lack of heating, often caused by a tripped fuse, low gas pressure, or a system lockout. Low hot water pressure can stem from airlocks in the system or a faulty pump.

Error codes displayed on the panel are your first clue – consult the dedicated section for decoding. If the system fails to ignite, check the gas supply and ensure the ignition sequence is functioning correctly. A noisy pump may indicate air within the system or a mechanical fault.

Remember to prioritize safety; if you suspect a gas leak, immediately shut off the supply and contact a qualified engineer. Regular maintenance, as detailed later, can prevent many of these issues.

No Heating: Potential Causes and Solutions

A lack of heating from your Vokera Easi Heat Plus can be unsettling, mirroring concerns about compromised scientific references. First, check the thermostat settings and ensure it’s calling for heat. A tripped circuit breaker or blown fuse is a common culprit – reset or replace as needed.

Low gas pressure can prevent ignition; verify the gas supply is open and functioning. The system might be locked out due to repeated failed ignition attempts – a reset is often required. A faulty air pressure switch or a problem with the Printed Circuit Board (PCB) could also be responsible.

Inspect the heat exchanger for blockages, and ensure the fan is operating correctly. If issues persist, consult a qualified heating engineer for diagnosis and repair. Prioritize safety and never attempt repairs you’re not comfortable with.

Low Hot Water Pressure: Diagnosis and Fixes

Experiencing low hot water pressure with your Vokera Easi Heat Plus, much like concerns over reliable information, requires systematic investigation. Begin by checking all taps and showers – is the low pressure isolated to one outlet or system-wide? Examine the hot water cylinder (if applicable) for any obvious issues.

A partially blocked plate heat exchanger is a frequent cause; descaling may be necessary. Inspect the pump for proper operation – listen for unusual noises. Air locks within the system can also restrict flow; bleeding the radiators might resolve this. Verify the inlet water pressure to the boiler is within the manufacturer’s specified range.

If the problem persists, a faulty diverter valve or a blockage in the hot water pipes could be the issue. Contact a qualified heating engineer for a thorough assessment and professional repair.

Error Codes: Decoding System Messages

Like interpreting complex scientific evidence, understanding Vokera Easi Heat Plus error codes is crucial for effective troubleshooting. These codes, displayed on the control unit, signal specific faults within the system. Refer to your manual for a complete list and their meanings – don’t attempt to guess!

Common codes relate to ignition failure, flame detection issues, low water pressure, or problems with the pump or fan. Some codes may indicate a blocked flue or a gas supply issue, requiring immediate attention from a qualified engineer. Resetting the boiler after addressing the identified fault is often necessary.

Documenting the error code before resetting can aid a technician’s diagnosis. Ignoring error codes can lead to more significant damage and compromise system safety. Treat these messages as vital diagnostic tools, similar to how judges rely on expert analysis.

Maintenance and Servicing

Just as a reference manual requires updates, your Vokera Easi Heat Plus demands regular maintenance for optimal performance and longevity. Routine checks, performed by a qualified engineer, are essential. These include inspecting the heat exchanger, pump, fan, and flue for any signs of wear or damage.

Annual servicing is non-negotiable, ensuring compliance with gas safety regulations and preventing potential hazards. Descaling the heat exchanger is vital, preventing limescale buildup that reduces efficiency and can cause overheating. Filter cleaning is also a key component of routine maintenance.

Proactive maintenance, like ensuring access to reliable information, avoids costly repairs and extends the boiler’s lifespan. Keep records of all servicing and repairs, and always use genuine Vokera parts for replacements.

Regular Maintenance Tasks for Longevity

Maintaining a clear and updated reference, much like your Vokera Easi Heat Plus, requires consistent effort. Monthly visual inspections are crucial: check for leaks around connections, examine the flue for obstructions, and listen for unusual noises during operation. Regularly dust the exterior casing to ensure proper ventilation.

Quarterly, inspect and clean the air intake and outlet filters. Annually, a qualified engineer should perform a comprehensive service, including a combustion analysis and safety checks. Monitor the system pressure and top up if necessary, following the manufacturer’s guidelines.

Consistent attention to these tasks, mirroring the diligence needed for accurate information, will significantly extend the life of your boiler and maintain its efficiency, preventing unexpected breakdowns and costly repairs.

Descaling the Heat Exchanger: Preventing Damage

Just as maintaining reliable information sources is vital, protecting your Vokera Easi Heat Plus’s heat exchanger is paramount. Hard water causes limescale buildup, reducing efficiency and potentially leading to overheating and failure. Regular descaling, typically every 1-2 years depending on water hardness, is essential.

This process involves flushing a descaling solution through the system to dissolve the limescale. Always use a descaler specifically designed for boilers and follow the manufacturer’s instructions meticulously. Incorrect descaling can damage internal components.

A qualified engineer should ideally perform this task, ensuring complete removal of the limescale and a thorough flush to remove any remaining solution. Proactive descaling, like verifying information, safeguards against long-term issues and maintains optimal performance.

Annual Servicing: Importance and What’s Involved

Similar to the need for unbiased scientific reference, a yearly service ensures your Vokera Easi Heat Plus operates safely and efficiently. Annual servicing, conducted by a Gas Safe registered engineer, is not merely recommended – it’s crucial for maintaining warranty validity and preventing costly breakdowns.

A typical service includes a comprehensive inspection of all components: the heat exchanger, burner, flue, pump, and controls. The engineer will check for gas leaks, assess combustion efficiency, and clean vital parts. They’ll also verify the operation of safety devices like the carbon monoxide detector.

This proactive approach, much like expert review, identifies potential issues before they escalate. Regular servicing extends the boiler’s lifespan, optimizes fuel consumption, and provides peace of mind, ensuring reliable heating and hot water throughout the year.

Safety Precautions

Echoing concerns about compromised scientific integrity, prioritizing safety with your Vokera Easi Heat Plus is paramount. Never attempt repairs yourself; always engage a Gas Safe registered engineer. Tampering can lead to dangerous gas leaks, carbon monoxide poisoning, or system malfunction.

Ensure a carbon monoxide detector is installed in the same room as the boiler, regularly testing its functionality. Be aware of the symptoms of carbon monoxide poisoning – headache, dizziness, nausea, and confusion – and know emergency procedures.

Maintain clear access to the boiler for servicing and inspection. Do not obstruct the flue or ventilation openings. Familiarize yourself with the emergency shut-off procedures and gas supply isolation valve. Like relying on verified data, these precautions safeguard your home and family.

Carbon Monoxide Detection: Essential Safety Measures

Mirroring the recent debates on reliable scientific evidence, proactive carbon monoxide (CO) detection is crucial for Vokera Easi Heat Plus users. CO is a colorless, odorless, and deadly gas produced by incomplete combustion. A properly functioning boiler should not produce CO, but malfunctions can occur.

Install a certified CO detector on each level of your home, especially near sleeping areas. Choose a detector with a digital display showing CO levels. Test the detector monthly and replace it according to the manufacturer’s instructions (typically every 5-7 years).

Recognize the symptoms of CO poisoning: headache, dizziness, weakness, nausea, vomiting, chest pain, and confusion. If the alarm sounds, evacuate immediately and call emergency services. Like verifying information sources, consistent CO monitoring is vital for safety.

Gas Safety Regulations: Compliance and Awareness

Reflecting concerns about independent expertise, adherence to gas safety regulations is paramount when operating a Vokera Easi Heat Plus. All gas appliances must be installed and serviced by a Gas Safe registered engineer – a legal requirement ensuring competence and safety.

Regular gas safety checks are essential, ideally annually, to identify potential hazards like gas leaks or incomplete combustion. These checks verify the appliance’s operational integrity and compliance with current standards. Keep records of all servicing and safety checks.

Be aware of the signs of a gas leak: a gas smell, whistling or hissing from the appliance, or a yellow flame instead of blue. If you suspect a leak, immediately turn off the gas supply, ventilate the area, and contact Gas Safe. Just as verifying sources is crucial, compliance safeguards your home.

Emergency Procedures: What to Do in a Crisis

Mirroring the need for reliable information in legal contexts, knowing emergency procedures for your Vokera Easi Heat Plus is vital. In the event of a gas leak – identified by smell, hissing, or a yellow flame – immediately shut off the gas supply at the meter. Do not operate any electrical switches, as this could create a spark.

Open windows and doors to ventilate the area thoroughly. Evacuate all occupants, and from a safe location, contact the Gas Emergency Helpline (0800 111999). Do not re-enter the property until it’s declared safe by qualified professionals.

For carbon monoxide (CO) alarm activation, evacuate immediately and call emergency services. CO is odorless and deadly. Similarly, if the boiler malfunctions with unusual noises or error codes, switch it off and contact a Gas Safe registered engineer. Prioritize safety and swift action, just as accurate evidence is prioritized.

manual for shark professional vacuum

Shark Professional Vacuum: A Comprehensive Manual Guide

Welcome! This guide provides essential information for your Shark Professional vacuum, covering operation, maintenance, and safety—downloadable PDFs are readily available online.

Congratulations on selecting a Shark Professional vacuum! This manual is designed to ensure optimal performance and longevity of your cleaning companion. Your new vacuum boasts powerful suction and versatile features, including Lift-Away technology for reaching difficult areas.

Before first use, carefully review this guide to understand all functionalities and safety precautions. Accessing the official Shark manual online (via model number search) provides a comprehensive PDF resource. Familiarize yourself with components like the dust cup, filters, and attachments.

This guide will walk you through setup, operation in both upright and Lift-Away modes, and essential maintenance procedures. Proper care, including regular filter cleaning and brushroll maintenance, will maximize cleaning efficiency and extend the life of your Shark vacuum.

Understanding Your Model Number (NV501, IZ400, etc.)

Identifying your specific Shark Professional vacuum model is crucial for accessing the correct manual and support resources. Common model numbers include NV501, IZ400, and variations within the Navigator and Stratos series. This number is typically located on a sticker on the underside of the vacuum unit or within the dust cup compartment.

The model number dictates the specific features, accessories, and filter types compatible with your vacuum. When downloading the official manual from the Shark website, always input the complete model number to ensure accuracy.

Incorrect manual usage can lead to improper maintenance or operation. Knowing your model allows you to find targeted troubleshooting advice and warranty information specific to your Shark vacuum.

Key Features and Components

Shark Professional vacuums boast Lift-Away technology, powerful suction, and versatile attachments for comprehensive cleaning on floors and above—explore each component!

Upright Mode Operation

Utilizing your Shark in upright mode is straightforward for standard floor cleaning. Ensure the dust cup is securely attached and the filters are correctly installed for optimal performance. Power on the vacuum and adjust the brushroll settings based on your floor type – carpet or hard floor.

The brushroll switch allows you to turn the brushroll on or off. For delicate hard floors, disengage the brushroll to prevent scratching. For carpets, engage the brushroll for deep cleaning and effective dirt removal. Maneuver the vacuum with smooth, overlapping strokes, allowing the powerful suction to lift debris.

Remember to maintain a consistent pace for best results. The swivel steering facilitates easy navigation around furniture and obstacles. Regularly check the brushroll for tangled hair or debris to maintain suction power.

Lift-Away Mode: Detaching and Using the Canister

The Lift-Away feature provides versatile cleaning for above-floor surfaces and hard-to-reach areas. To detach the canister, locate the release button – typically on the handle or pod – and press to unlock. Carefully lift the canister away from the base, ensuring it’s securely held.

Attach the desired accessory – crevice tool, dusting brush, or upholstery tool – to the canister’s wand. This allows targeted cleaning of furniture, stairs, and tight spaces. The lightweight canister is easy to carry and maneuver.

Remember to reattach the canister to the base for upright vacuuming. Ensure a firm click confirms secure connection.

Power Cord and Electrical Safety

Always prioritize electrical safety when operating your Shark Professional vacuum. Never pull the vacuum by the cord; grasp the plug directly to disconnect it from the outlet. Avoid using extension cords, as they can pose a tripping hazard and may not be compatible with the vacuum’s power requirements.

Inspect the cord regularly for damage – cuts, fraying, or exposed wires. Do not use the vacuum if the cord is damaged. Contact Shark customer support for repair or replacement. Keep the cord away from heated surfaces and avoid running it under rugs or furniture.

Ensure the outlet is properly grounded and avoid using the vacuum in wet or damp environments.

Dust Cup: Emptying and Cleaning

Regularly emptying the dust cup is crucial for maintaining optimal suction power. Detach the dust cup from the vacuum pod by following the release mechanism – typically a button or latch. Empty the contents into a trash receptacle, avoiding overfilling.

For thorough cleaning, wash the dust cup with cool water and a mild detergent. Ensure it is completely dry before reattaching it to the vacuum. Check for any blockages in the dust cup opening or within the canister itself.

Periodically wipe down the exterior of the dust cup with a damp cloth. Do not use abrasive cleaners or solvents.

Filtration System

Shark’s advanced filtration utilizes pre-motor and HEPA filters, capturing dust and allergens for a cleaner home environment—regular maintenance is key!

Filter Types: Pre-Motor and HEPA

Understanding your Shark’s filtration system is crucial for optimal performance. The pre-motor filter, typically foam or felt, protects the motor from large debris, extending its lifespan. It’s washable and should be cleaned regularly – usually monthly – to maintain suction power.

The HEPA filter (High-Efficiency Particulate Air) is your vacuum’s final defense, trapping 99.97% of microscopic particles like dust mites, pollen, and pet dander. This is especially important for allergy sufferers.

HEPA filters are not washable and require periodic replacement, typically every 6-12 months, depending on usage. Using non-Shark filters can void your warranty and compromise air quality, so always use genuine replacements. Check your model’s manual for specific filter types and replacement schedules.

Cleaning and Replacing Filters

Maintaining clean filters is vital for consistent suction. The pre-motor filter, after removal, should be hand-washed with cool water, ensuring it’s completely dry – typically 24 hours – before reinstallation. Avoid using detergents or soap.

HEPA filters cannot be washed. To replace, locate the filter compartment (refer to your model’s manual). Remove the old filter and insert the new one, ensuring a secure fit.

Regular inspection is key; a dirty or damaged filter significantly reduces cleaning effectiveness. Replacement frequency depends on usage, but generally, pre-motor filters need monthly cleaning and HEPA filters should be replaced every 6-12 months. Always unplug the vacuum before filter maintenance.

Importance of Filter Maintenance

Consistent filter maintenance directly impacts your Shark vacuum’s performance and longevity. Dirty filters restrict airflow, causing a loss of suction and forcing the motor to work harder, potentially leading to overheating and reduced lifespan.

Furthermore, compromised filtration allows fine dust and allergens to recirculate into the air, diminishing air quality. Regularly cleaning or replacing filters ensures optimal suction power, efficient cleaning, and a healthier home environment.

Neglecting filter care voids the warranty and can necessitate costly repairs. Prioritize filter upkeep for a powerful, reliable, and hygienic vacuuming experience.

Accessories and Attachments

Enhance cleaning versatility with included tools like the crevice tool, dusting brush, upholstery tool, and the powerful Pet Power Brush for targeted cleaning.

Crevice Tool: For Tight Spaces

The crevice tool is specifically designed to access narrow and hard-to-reach areas where standard vacuum heads cannot fit effectively. This attachment excels at cleaning along edges, in corners, between furniture cushions, and within tight gaps.

To utilize the crevice tool, securely attach it to the vacuum wand or directly to the Lift-Away canister. Apply gentle pressure while maneuvering the tool along the desired surface. Its slender profile allows for precise cleaning, removing dust, dirt, and debris from these often-neglected spaces.

Regular use of the crevice tool contributes to a more thorough and comprehensive cleaning experience, ensuring no area is left untouched. It’s an invaluable asset for maintaining a spotless home environment.

Dusting Brush: For Delicate Surfaces

The dusting brush attachment is ideal for gently cleaning delicate surfaces that could be scratched or damaged by harsher vacuum tools. This includes furniture, lampshades, bookshelves, and decorative items. Its soft bristles effectively lift dust without causing abrasion.

Attach the dusting brush to the vacuum wand or Lift-Away canister for extended reach. Use a light touch and slow, sweeping motions to avoid disturbing items or applying excessive pressure. The brush’s design allows it to conform to contours and capture dust from intricate details.

Regular dusting with this attachment preserves the appearance and condition of your valuable belongings, preventing dust buildup and maintaining a pristine home.

Upholstery Tool: Cleaning Furniture

The upholstery tool is specifically designed for effective cleaning of furniture, including sofas, chairs, and ottomans. It gently lifts dirt, dust, and pet dander from fabric surfaces without causing damage. This attachment is crucial for maintaining a clean and healthy living space.

Attach the upholstery tool to the vacuum wand or Lift-Away canister. Test on an inconspicuous area first to ensure compatibility with the fabric. Use overlapping strokes, applying gentle pressure to agitate and remove embedded debris.

For optimal results, regularly vacuum upholstery to prevent dust and allergens from accumulating. This tool helps extend the life of your furniture and improves indoor air quality.

Pet Power Brush: Removing Pet Hair

The Pet Power Brush is a specialized attachment engineered to tackle stubborn pet hair on upholstery, carpets, and stairs. Its rotating brushroll effectively lifts and removes embedded hair, dander, and allergens, leaving surfaces thoroughly clean. This tool is indispensable for pet owners seeking a hair-free home.

Securely attach the Pet Power Brush to the vacuum wand or Lift-Away canister. Activate the brushroll and use short, overlapping strokes across the affected areas. For carpets, adjust the brushroll height as needed for optimal performance.

Regular use of the Pet Power Brush minimizes pet hair buildup and contributes to a healthier indoor environment. Consistent cleaning prevents allergens from circulating and improves air quality.

Maintenance and Troubleshooting

Keep your Shark running smoothly! Regularly clean the brushroll, check for blockages, and address issues like suction loss or overheating for peak performance.

Brushroll Cleaning: Removing Hair and Debris

Maintaining a clean brushroll is crucial for optimal suction and cleaning performance with your Shark Professional vacuum. Regularly inspect the brushroll for tangled hair, string, and debris. Always unplug the vacuum before attempting any maintenance! Carefully remove the brushroll cover, typically by releasing clips or screws.

Once accessible, use scissors or the provided cleaning tool (if included with your model) to carefully cut and remove any wrapped materials. Ensure all debris is cleared from the bristles. Reinstall the brushroll, securing the cover properly; A clogged brushroll significantly reduces cleaning effectiveness and can strain the motor. Consistent cleaning extends the life of your vacuum and ensures powerful performance on all floor types. Refer to your specific model’s manual for detailed instructions and diagrams.

Checking for Blockages in Hoses and Ducts

Loss of suction often indicates a blockage within the hose, wand, or ducts of your Shark Professional vacuum. Always disconnect the power before inspecting for obstructions. Detach the hose and wand, visually inspecting for visible clogs. Use a long, flexible object – like a broom handle – to gently dislodge any blockages.

Check the floor nozzle and the area where the hose connects to the vacuum body. Ensure the dust cup is empty, as a full cup can restrict airflow. A thorough inspection prevents motor overheating and maintains optimal cleaning power. Refer to your model’s manual for specific disassembly instructions. Regular checks and prompt removal of blockages are vital for sustained performance.

Troubleshooting Common Issues (Loss of Suction, Overheating)

Loss of suction is frequently caused by a full dust cup, clogged filters, or blockages in hoses and ducts. Overheating typically results from restricted airflow due to these same issues. First, empty the dust cup and clean or replace the filters. Inspect the hose, wand, and floor nozzle for obstructions, removing any debris found.

If overheating persists, immediately turn off and unplug the vacuum, allowing it to cool completely. Avoid using the vacuum on excessively thick carpets for extended periods. Consult your model’s manual for specific troubleshooting steps and error indicators. Contact Shark customer support if problems continue.

Safety Precautions

Always unplug before servicing, never use with wet hands, and do not operate without filters—use only Shark accessories for safe operation.

Avoiding Damage to the Vacuum

Protect your investment! To prevent damage, never operate the Shark vacuum with a full dust cup, as this can strain the motor and reduce suction power. Avoid vacuuming large, hard objects or sharp items that could harm the brushroll or internal components.

Regularly check for blockages in the hose, wand, and floor nozzle, as obstructions can cause overheating and motor failure. Do not pull the vacuum by the cord; always grasp the plug to disconnect it. Ensure the filters are clean and properly installed, as a clogged filter restricts airflow and can damage the motor. Avoid using the vacuum on excessively wet surfaces, and always follow the floor type guidelines to prevent scratching or damage.

Proper Usage on Different Floor Types

Optimize cleaning! For hard floors, switch off the brushroll to prevent scattering debris and avoid scratching. Utilize the bare floor setting if available; On carpets, engage the brushroll for effective dirt removal; adjust the height setting for optimal performance based on carpet pile.

Delicate rugs require a gentle approach – use the lowest suction setting or the handheld mode. Avoid using the motorized brush head on delicate area rugs. Always test a small, inconspicuous area first. Do not force the vacuum across transitions between floor types; adjust settings accordingly. Regular adjustments ensure efficient cleaning and prolong the life of your Shark vacuum.

Electrical Safety Guidelines

Prioritize safety! Always unplug the vacuum before any maintenance or troubleshooting. Never operate with a damaged cord or plug – replace immediately. Do not use outdoors or on wet surfaces. Avoid pulling the cord to unplug; grasp the plug itself.

Ensure the electrical outlet is properly grounded. Do not use an extension cord unless absolutely necessary, and if so, select one rated for the vacuum’s amperage. Keep the cord away from heated surfaces and sharp objects. Never attempt to repair the vacuum yourself; contact qualified service personnel. Following these guidelines prevents electrical hazards and ensures safe operation.

Downloading the Official Shark Manual

Access digital copies! Easily find your Shark vacuum’s manual online by entering your specific model number for a downloadable PDF version.

Locating Your Model’s Manual Online

Finding your specific Shark Professional vacuum manual is straightforward! Begin by visiting the official Shark website. Navigate to the support section, often labeled “Customer Support” or “Manuals & FAQs.”

There, you’ll typically find a search bar or a dedicated manual lookup tool. Enter your vacuum’s model number – crucial for accurate results (e.g., NV501, IZ400). The website will then display a list of relevant manuals.

Alternatively, a broader search using keywords like “Shark vacuum manual” plus your model number in a search engine (Google, Bing) can also lead you directly to the official PDF. Ensure the website is legitimate to avoid downloading potentially harmful files. Shark’s official site guarantees a safe and accurate download.

PDF Manual Access and Features

Downloaded Shark Professional vacuum manuals are typically in PDF format, offering convenient access and usability. These digital manuals are searchable, allowing you to quickly find specific information regarding troubleshooting, maintenance, or operation.

PDFs often include detailed diagrams illustrating component locations and assembly instructions. You can zoom in for clarity and print specific pages for easy reference during cleaning or repairs.

Features commonly found within the PDF include safety precautions, a comprehensive parts list, step-by-step instructions for various tasks, and warranty information. Digital access ensures you always have the latest version of your manual readily available, eliminating the need for physical storage.

Warranty Information

Shark vacuums come with a limited warranty covering defects in materials and workmanship; review your manual for specific terms and customer support details.

Understanding Your Shark Warranty

Your Shark Professional vacuum is protected by a limited warranty, designed to ensure your satisfaction and peace of mind. The duration and coverage specifics vary depending on your exact model – always refer to the warranty information included with your vacuum or available in the official manual.

Generally, the warranty covers defects in materials and workmanship under normal household use. It does not cover damage resulting from misuse, accidents, alterations, or lack of proper maintenance, like filter cleaning. Proof of purchase is crucial for any warranty claim.

To initiate a claim, contact Shark Customer Support (details provided later). Be prepared to provide your model number, purchase date, and a description of the issue. Retain your original packaging, as it may be required for returns. Understanding these terms will streamline any potential warranty process.

Contacting Shark Customer Support

Need assistance with your Shark Professional vacuum? Shark offers multiple channels for customer support, ensuring you can easily find solutions to your questions or concerns. The quickest way to get help is often through their official website, where you’ll find a comprehensive FAQ section and troubleshooting guides.

For direct assistance, you can reach Shark via their toll-free number: 1-800-798-7398. Be prepared to have your model number handy. Alternatively, explore their website for live chat options or email support.

Remember to have your purchase information available when contacting support. Shark’s customer service team is dedicated to providing prompt and helpful assistance, ensuring your vacuum operates optimally.